幫 Github Pages 自訂網址再透過 CloudFlare 加上 https
上一篇 Post not found: free-heroku-app-custom-domain-name-on-https-use-clouldflare 之後,這次要來幫 Github Pages 加上自訂網址與 https。本次就跳過了一些上次說過的事情(有興趣的讀者可以自行前往閱讀),直接帶大家走一遍設定流程。
Github Pages
官方介紹:https://pages.github.com/
只要會一點 git 即可輕鬆且免費地部署靜態資源到 Github Pages 上,通常被拿來建立 Blog,或是做成文檔和 Demo 網頁,也可以放一些簡單的 SPA 網頁應用。
需要
- Github 帳號
- Domain name
- CloudFlare 帳號
步驟
這邊以我買的網域:https://yanghongxin.com 和我的 Github: https://github.com/jk195417 作為例子
Github 設定 CNAME
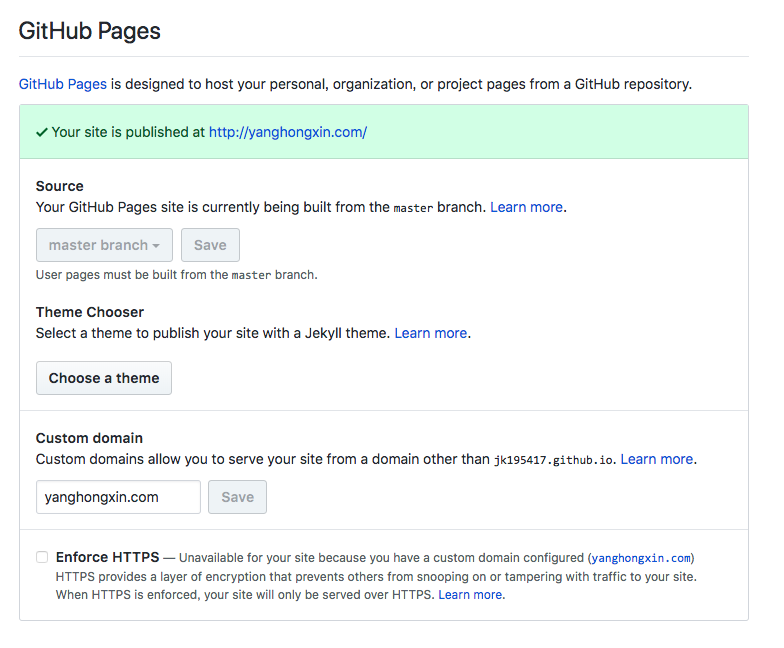
到自己的 帳號.github.io 的 Github Repo
沒有的話就開一個吧。參閱 https://guides.github.com/features/pages/
點選 Setting 頁籤

至 Github Pages 設定 Custom domain,它會幫你在此 repo 下建立一個 CNAME 檔案,當你瀏覽這個 Github Pages 時,網址顯示的就會是你自定的網址而不是 Github Pages 提供的網址。
CloudFlare 設定 DNS
CloudFlare > Add site > 填入你的網域
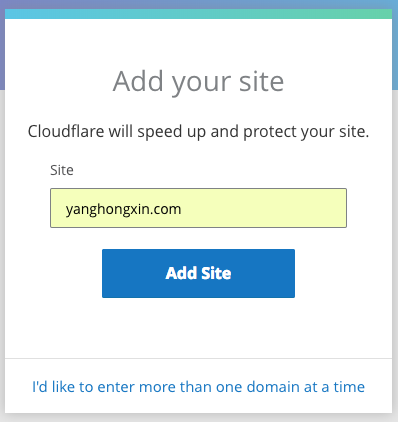
接者 CloudFlare 會去調出你的網域的 Nameserver 供應商的 DNS 設定
新增 CNANE,Name 填入子網域如 www 或根網域 @,Value 填入 GitHub Pages 預設的網址 <username>.github.io。記得要讓要用的 Record 們的橘燈都亮起來喔。
CloudFlare 選擇方案 Free
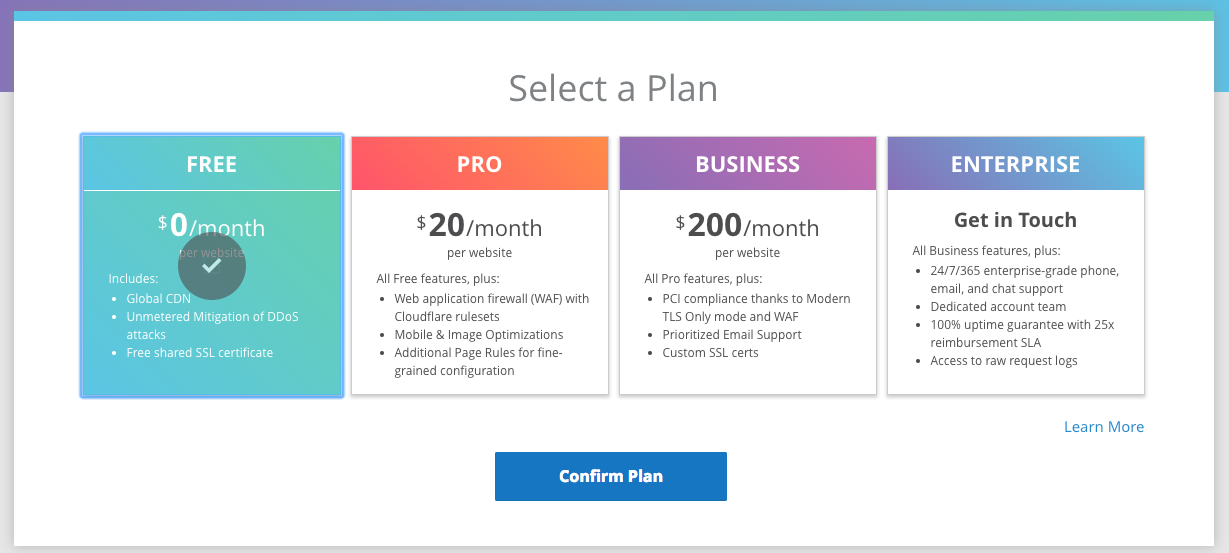
一樣不解釋
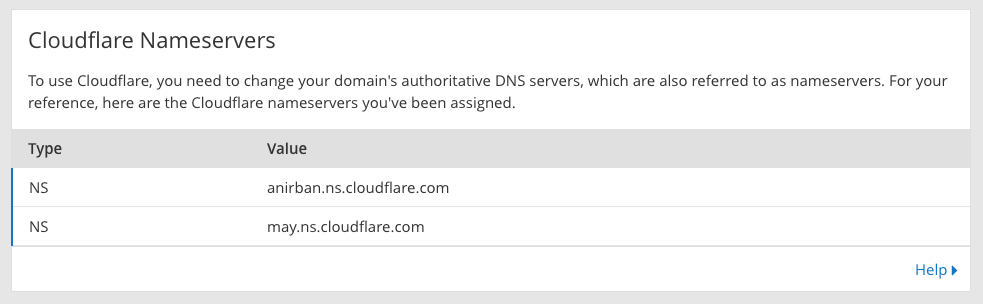
更改網域 Nameservers
把網域的 Nameservers 改成 CloudFlare 提供的 Nameservers(DNS 頁籤往下翻),這樣一來,剛剛在 CloudFlare 設定的 DNS 才會生效。
NS 設成 CloudFlare:流量 -> CloudFlare -> Github
到當初買網址的網域供應商平台上做設定,EX: Godaddy, Gandi.net, Namecheap, Hover …
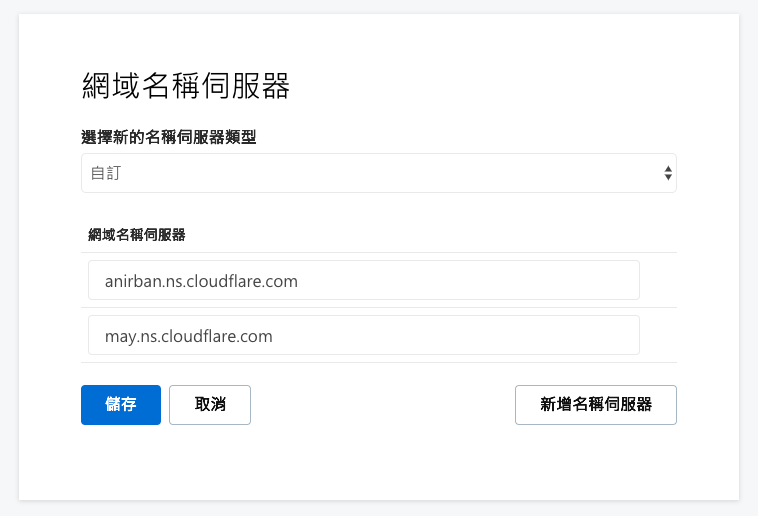
以 Godaddy 為例
設定成功後會在 Overview 看到 Status: Active 如:

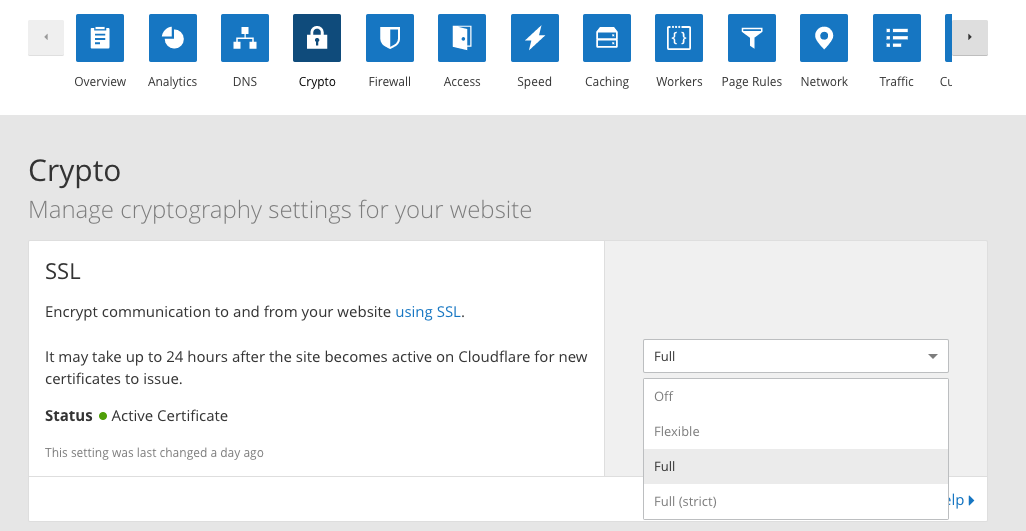
CloudFlare 開啟 SSL
CloudFlare > Crypto > SSL 選 Full,等上個15分鐘至一天,若是超過一天都還沒好的話在做下面的步驟。
SSL 憑證等待過久
請看Post not found: free-heroku-app-custom-domain-name-on-https-use-clouldflare 上一篇的 等 SSL 憑證發行太久 章節
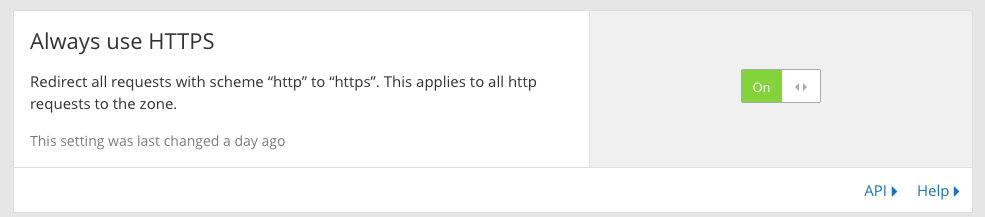
把 http 請求全部導向 https(選擇性)
等憑證發下來在用
CloudFlare > Select Website > Crypto > Always use HTTPS > On
參考連結
幫 Github Pages 自訂網址再透過 CloudFlare 加上 https
https://blog.yang-hong-xin.com/github-pages-custom-domain-on-https-use-cloudflare/